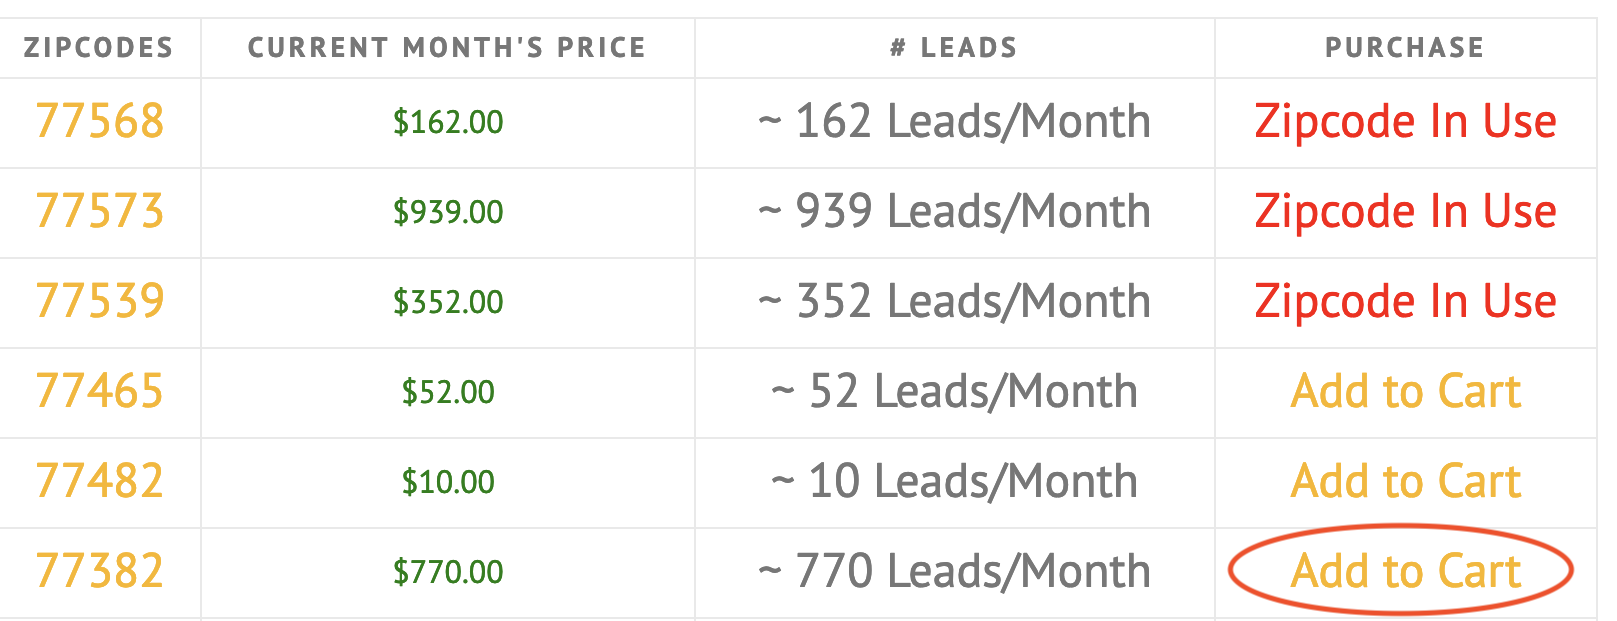
Step 1: Choose Your Zipcodes
Click the Select Zipcodes page from the Main Menu. On the Select Zipcodes page click the Add to Cart button in order to add a zipcode to your order.
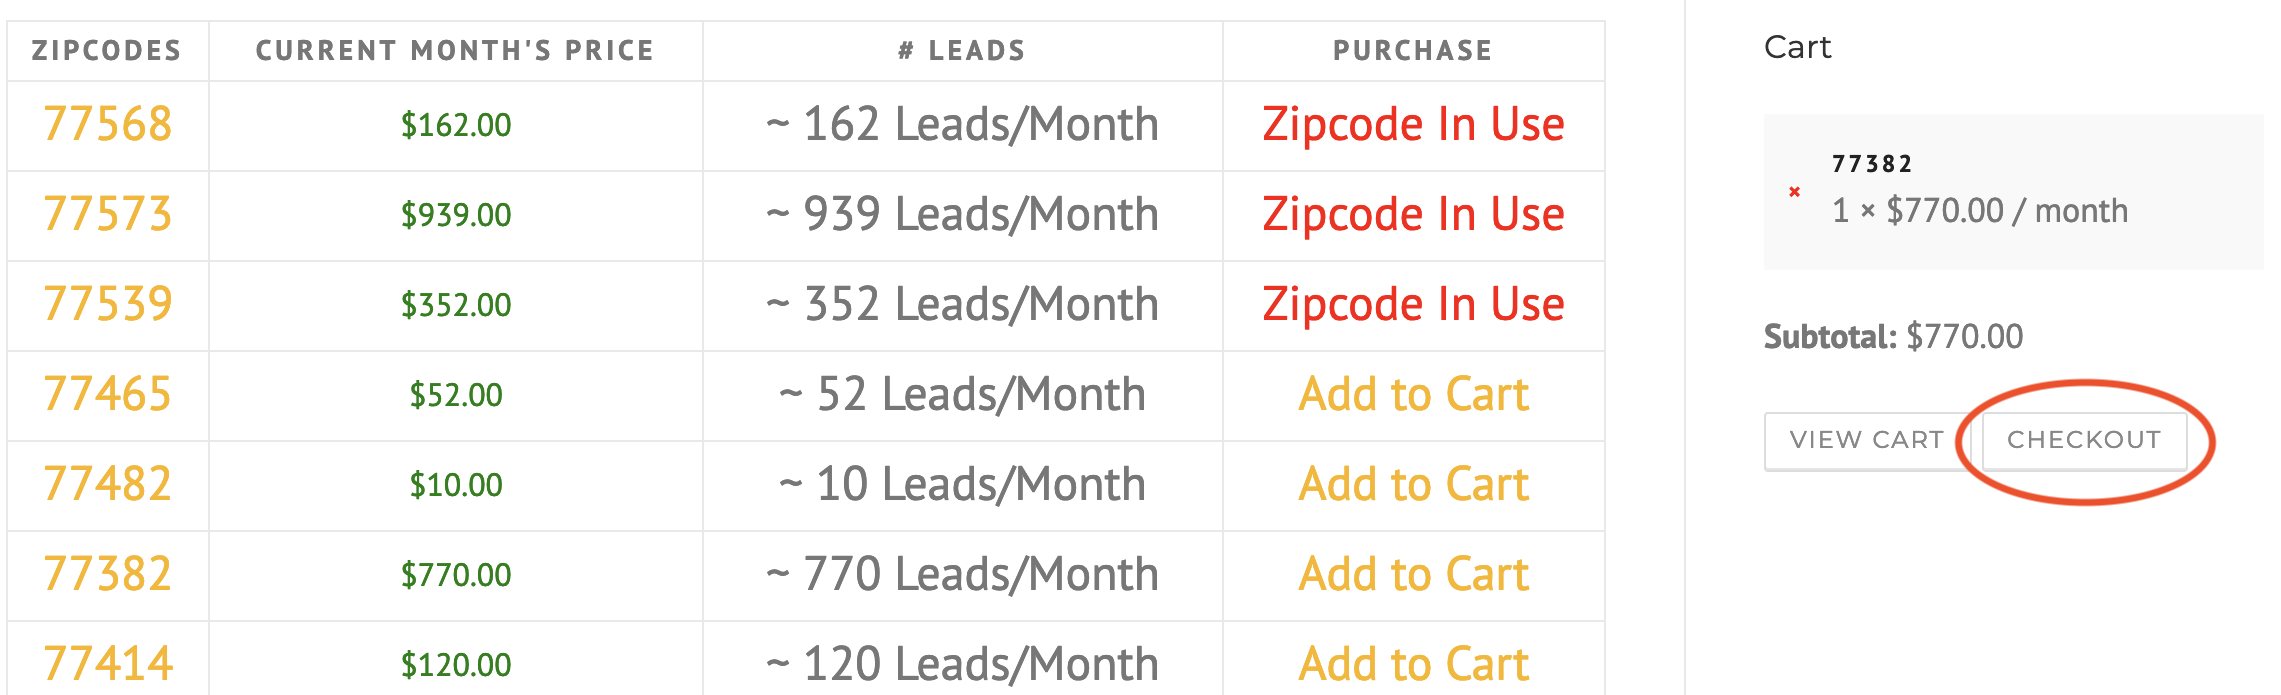
Step 2: Checkout
The sidebar will display all of the zipcodes that you’ve added to your cart. Click on the Checkout button in order to complete your order.
Step 3: Complete Your Order
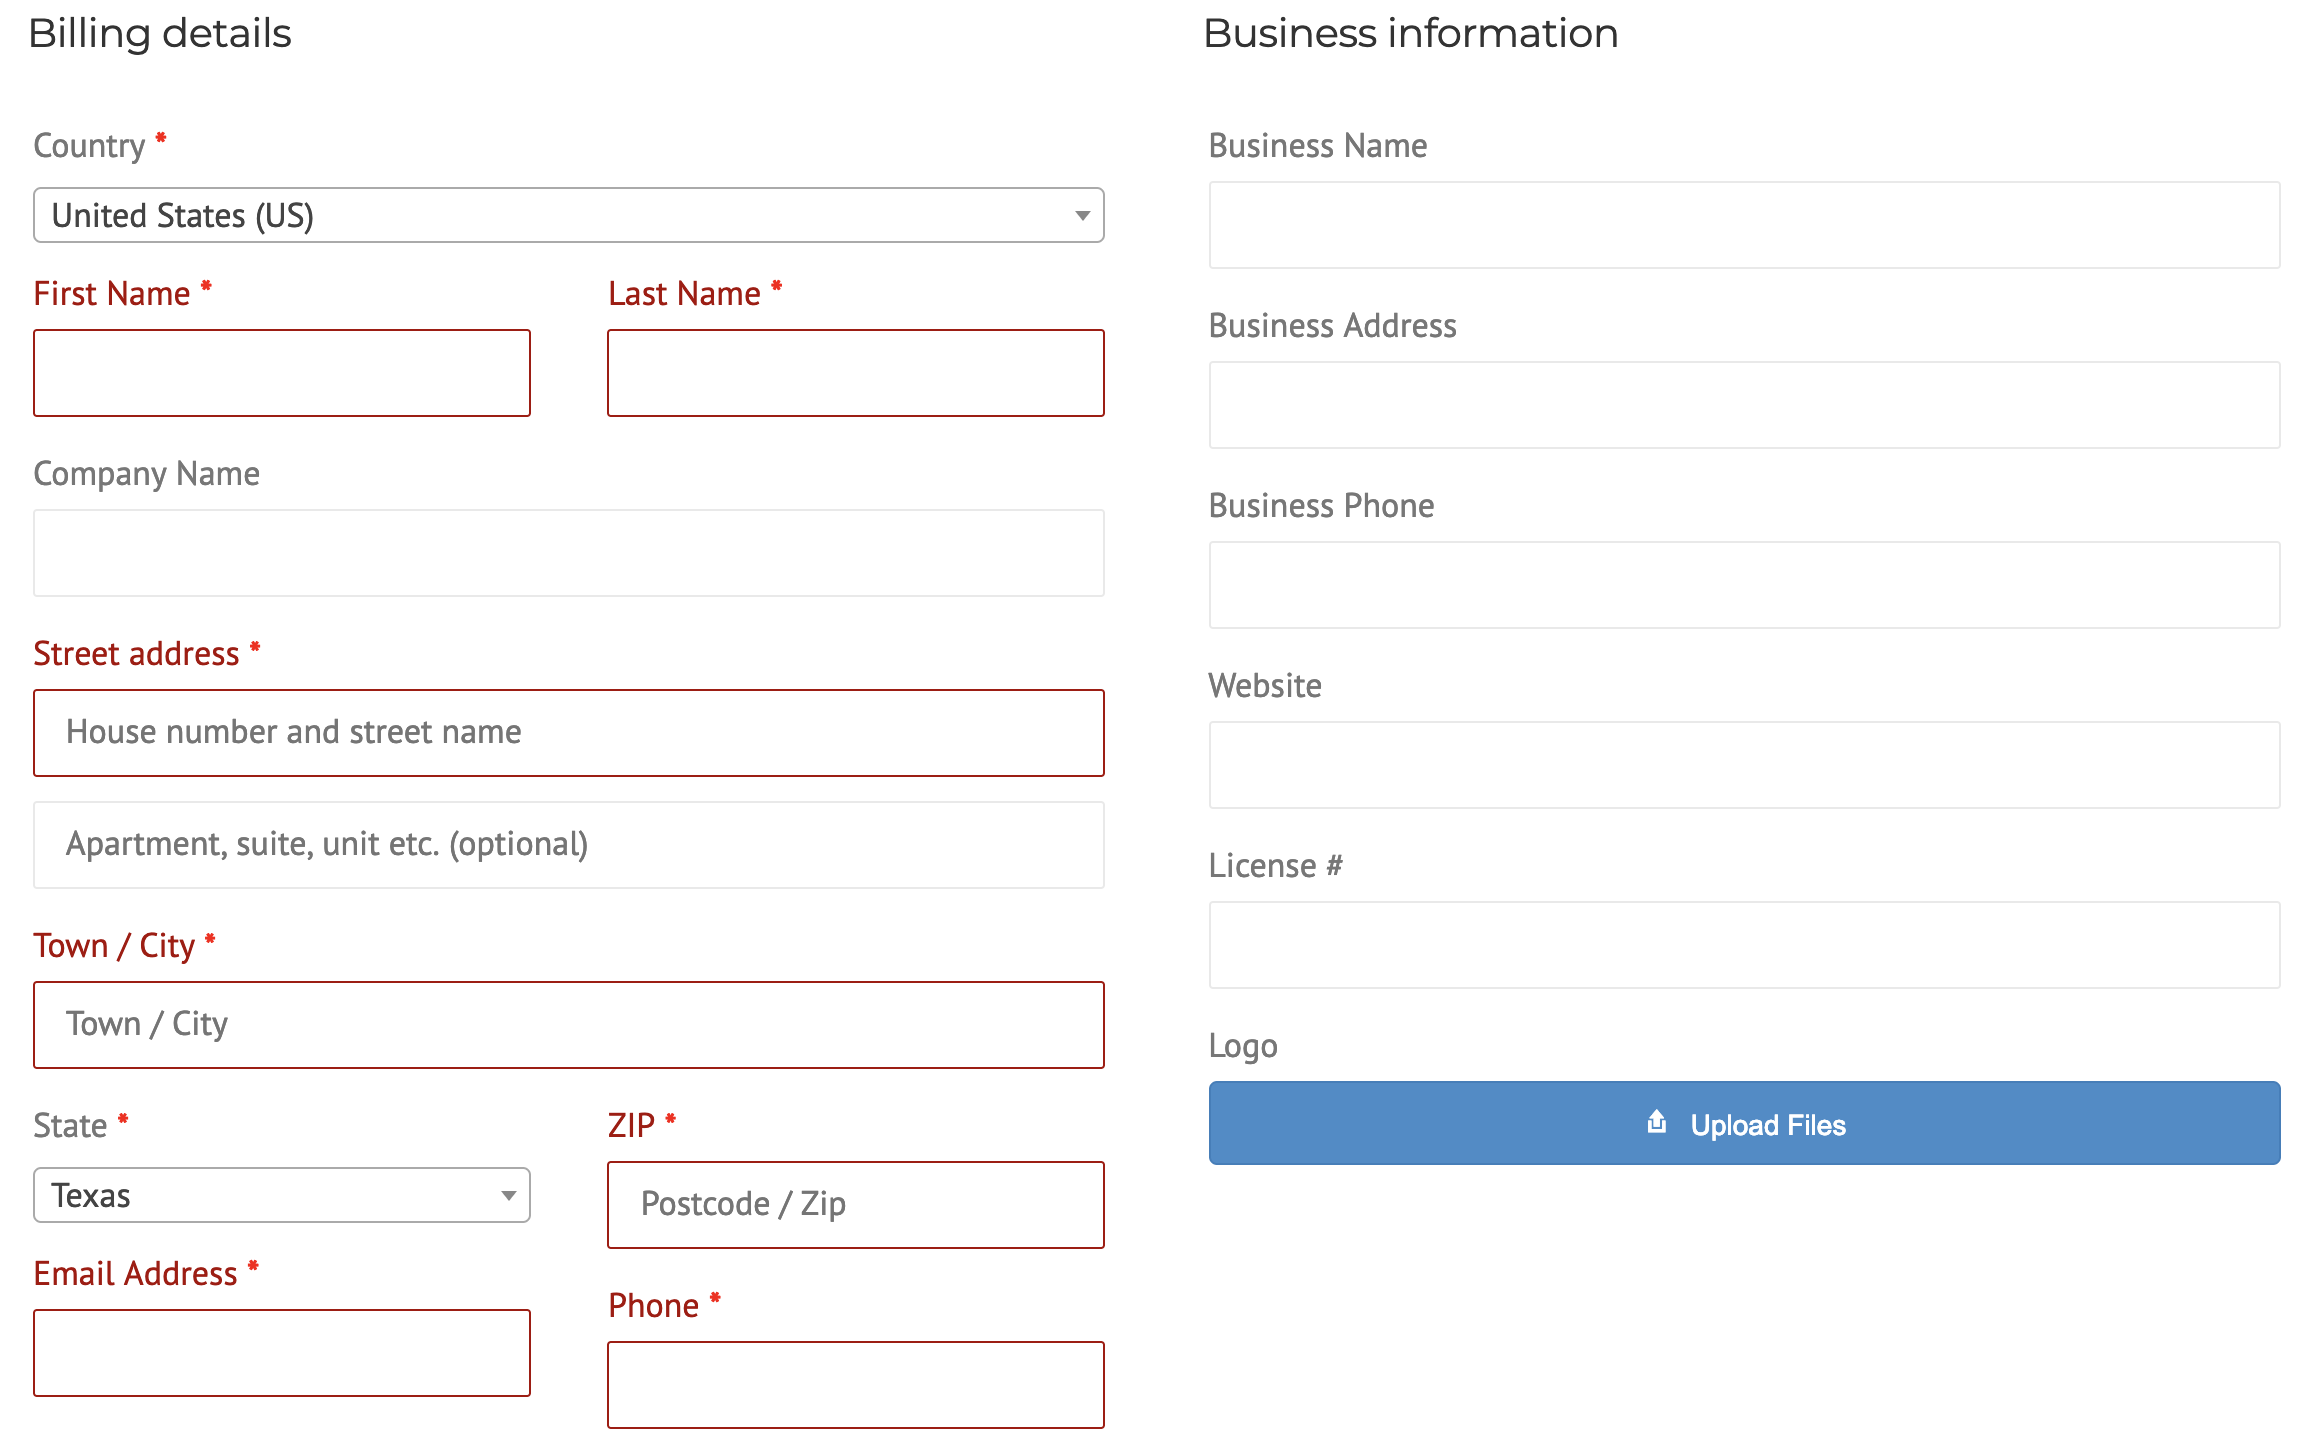
Under the Billing information section you will enter your billing details. Under the Business information section you will enter all information you want to be used for your mailer.
To upload your company logo, click the blue upload button. A pop-up will display where you can select an image from your hard drive. Select the image on your hard drive and click Open.
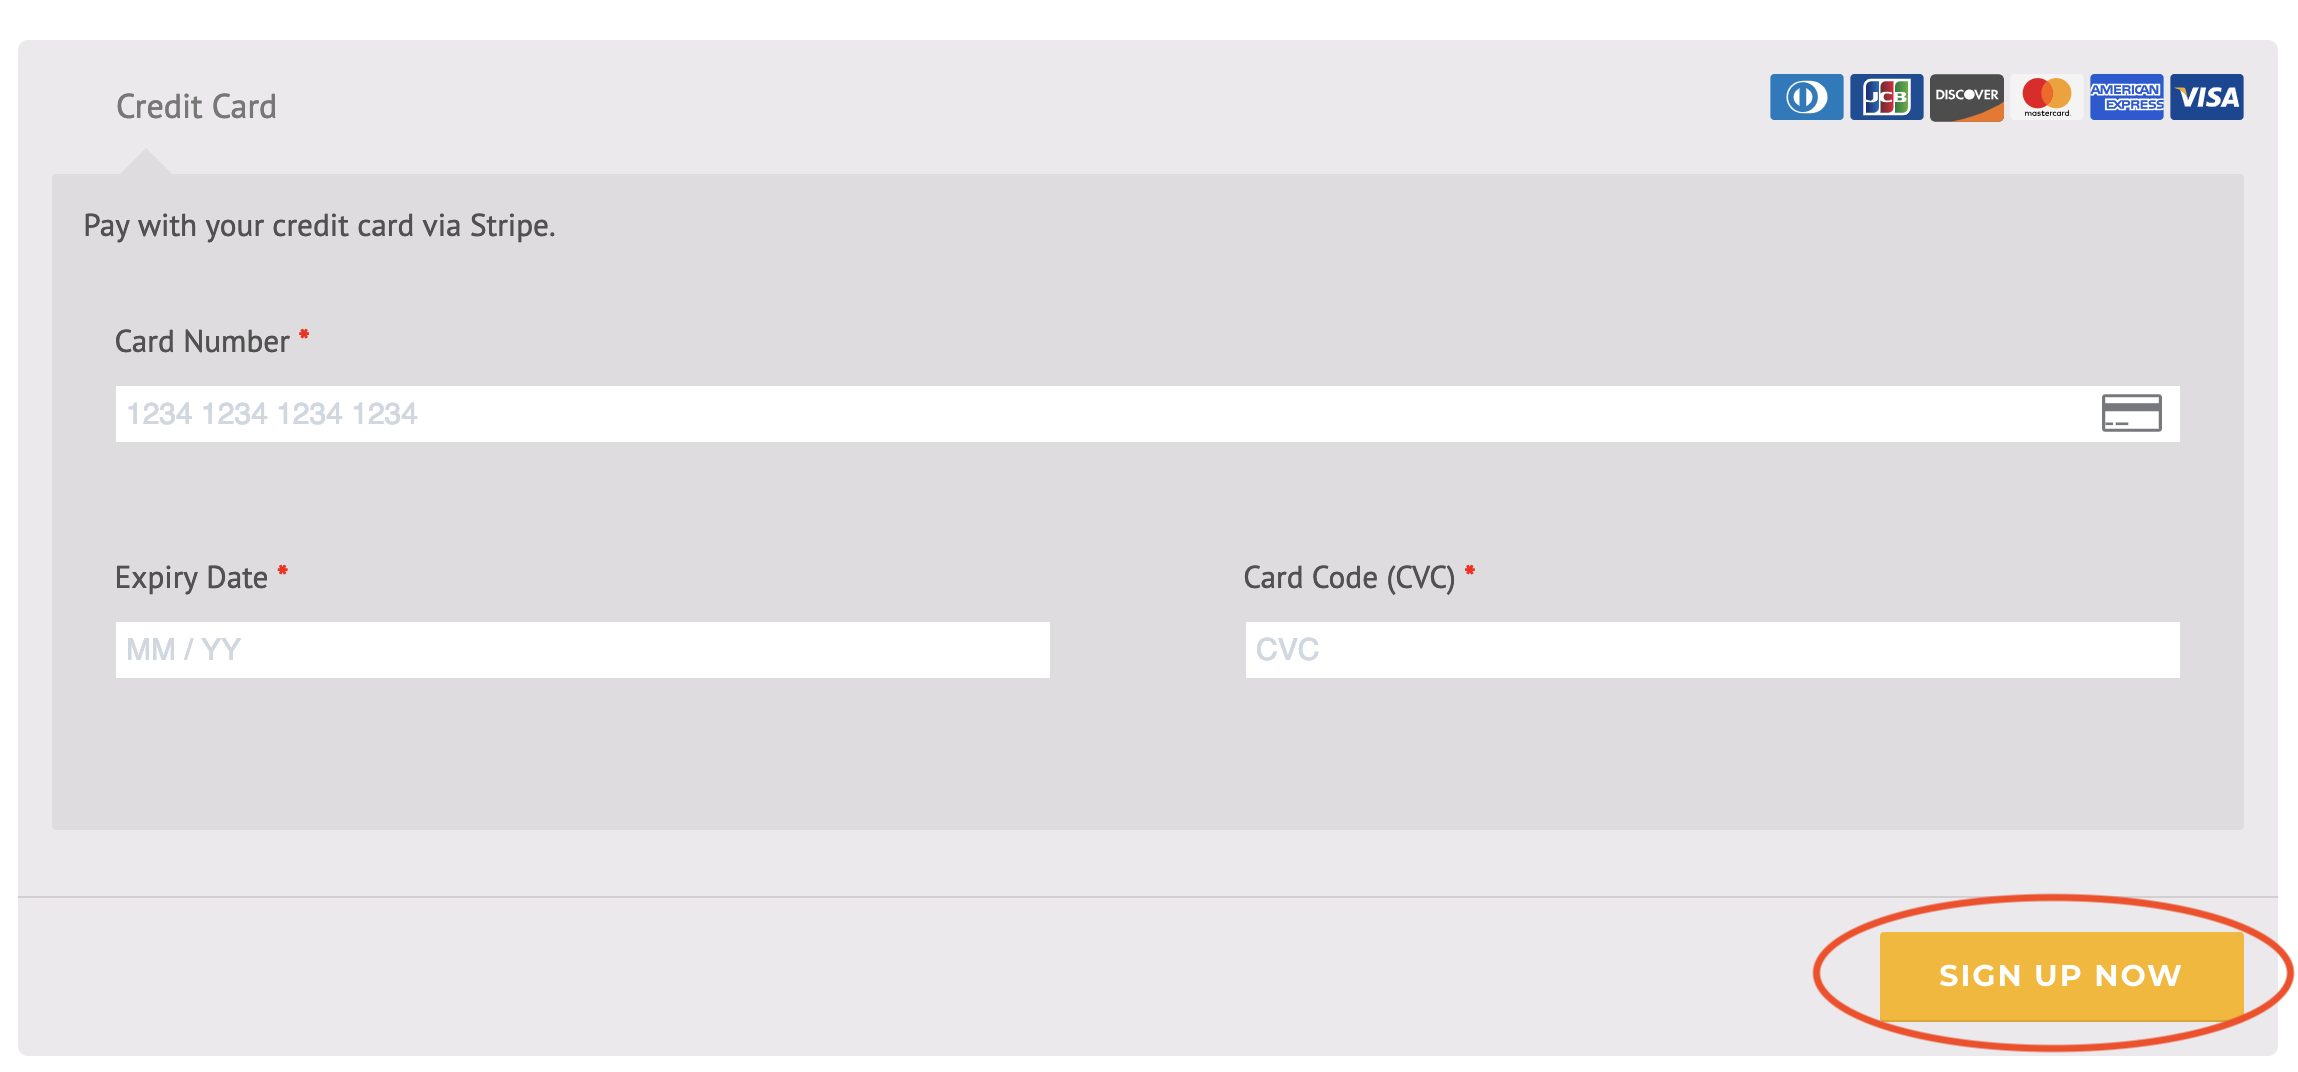
Next, fill out your credit card information and click the Sign Up Now button.
Please double check all Business Information for accuracy.
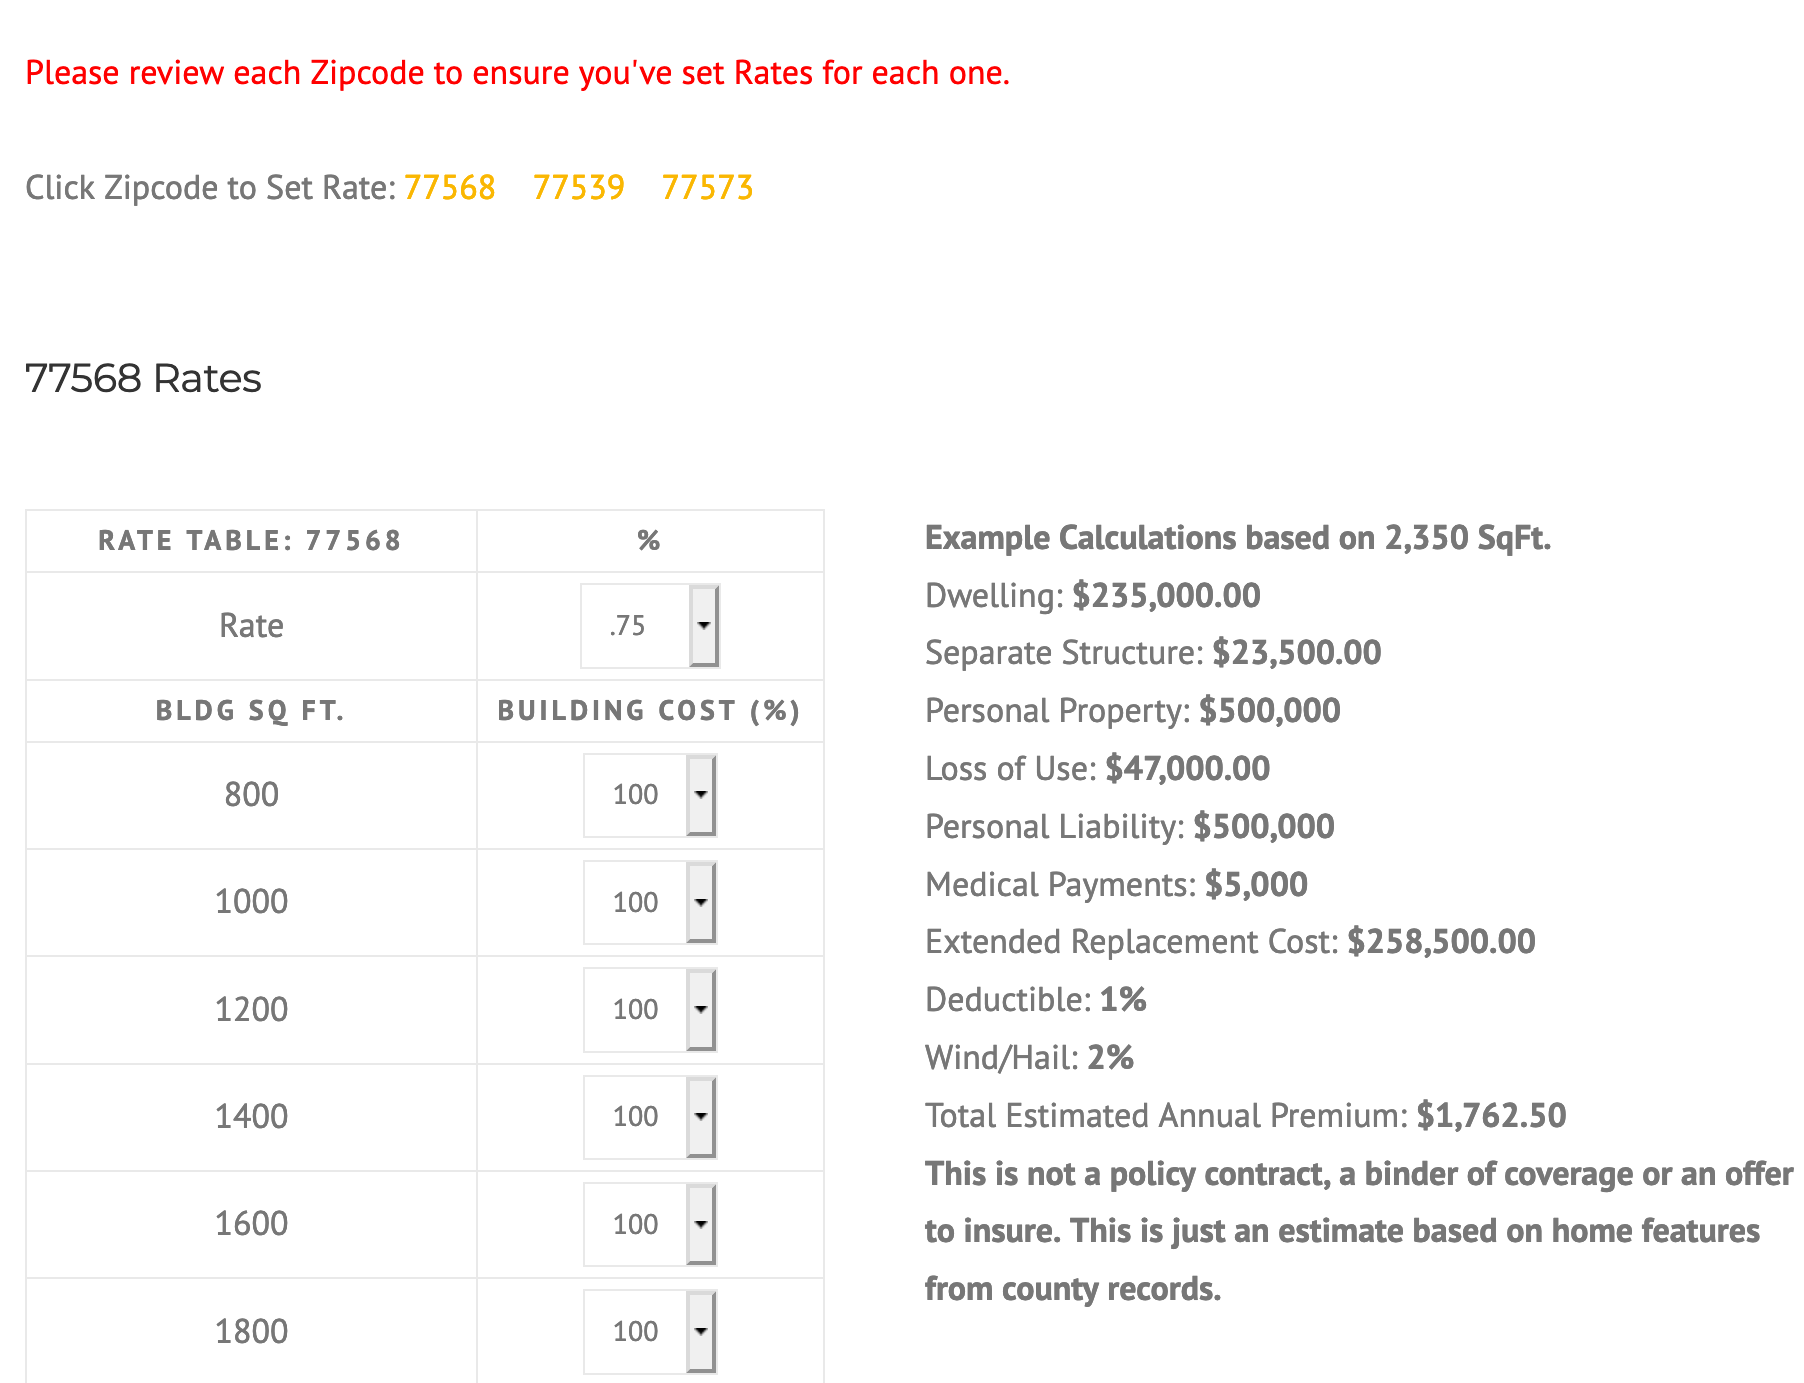
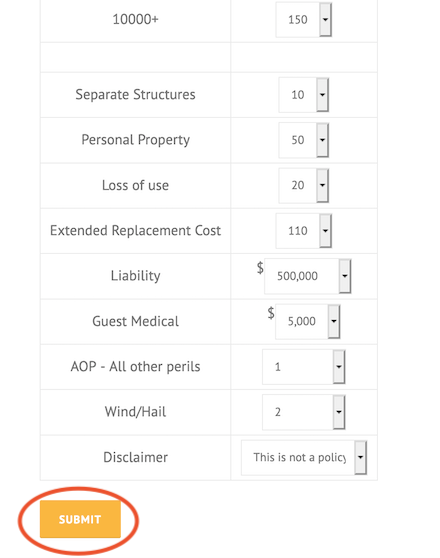
Step 4: Set Rates for each Zipcode
Once you’ve placed your order you can set the rates for each Zipcode by clicking on the Set Rates page from the main menu. After you’ve changed each setting you will need to click the Submit button to save the changes for that Zipcode. Complete the same steps for each Zipcode you’ve purchased.
Note: If you have multiple zipcodes you will need to scroll through each zipcode and set the rates individually.